Segmented Ring Jig #008
build-it system > incra free jig plans
Segmented Ring Jig - 008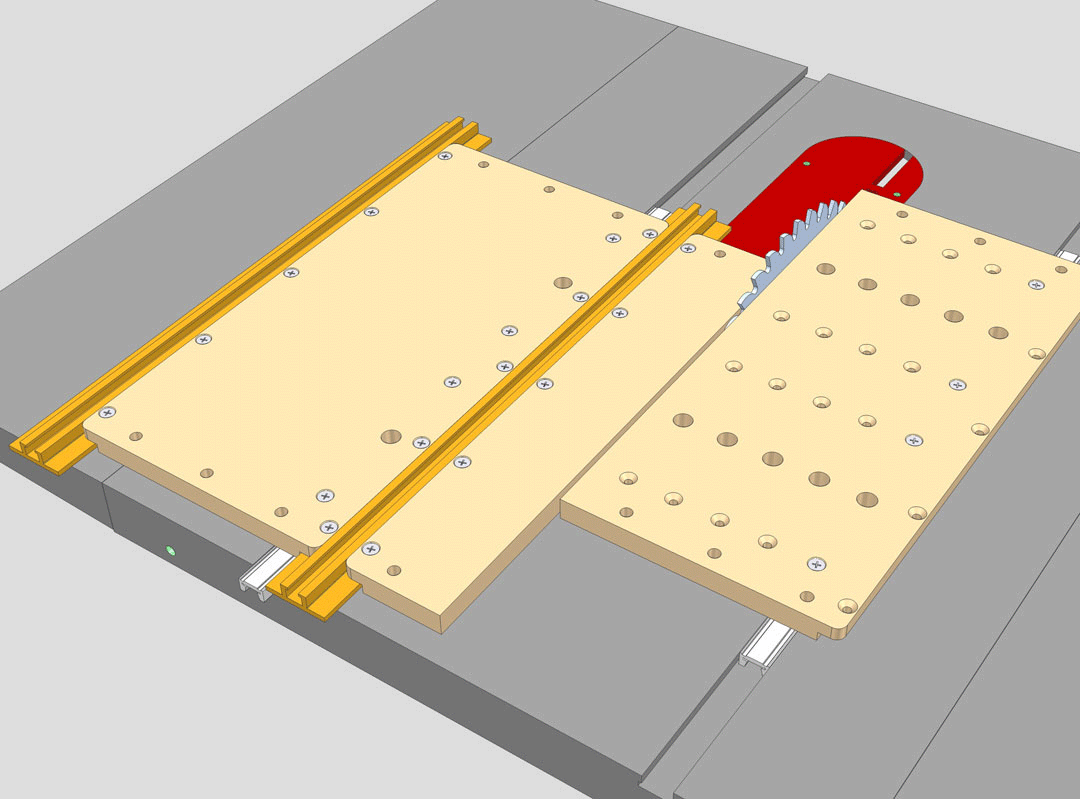
Build-It Platform Components Required:
- 1 Small Build-It Panel
- 1 Large Build-It Panel
- 2 Miter Sliders
- 2 T-Slot Panel Connectors
One of the more common methods for producing segmented rings uses a miter gauge to control the angle of the cut and a stop block clamped to the infeed end of the table saw's rip fence to set the segment length. You simply trim the end of a long piece of stock, flip the material and advance to contact the stop block,
then make another cut to part off the segment. While this "cut, flip, advance, cut" routine is fairly quick, it does present a couple of problems. First of all, the cut that removes each segment from the main stick always leaves a cutoff nib on the segment, which must be sanded off before glue-up. Second, flipping the stock after each cut means that in the final glue-up, every other piece has a potentially different color in the grain creating a "checkerboard" effect.
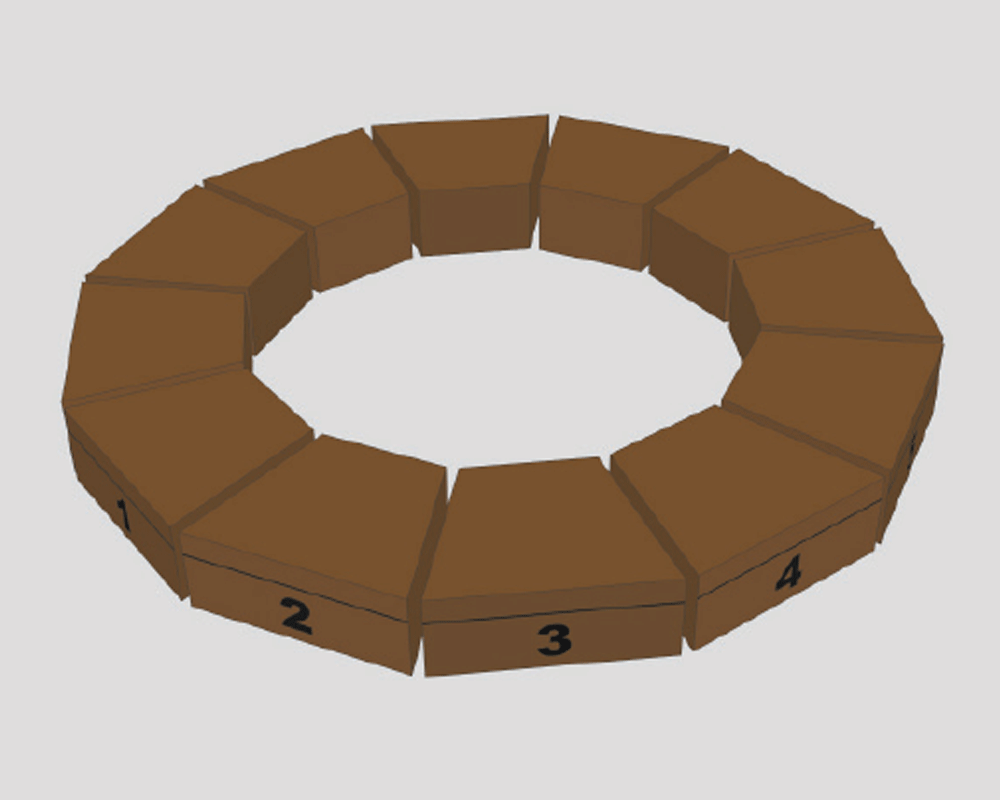
The simple jig shown here solves both of these problems. A common reference edge (the outside of the ring) is maintained against the jig's fence during all of the angled cuts to insure proper color and grain sequencing during glue-up and, since the securely clamped segment is unable to move away from the blade, no cutoff nib is left to worry about.
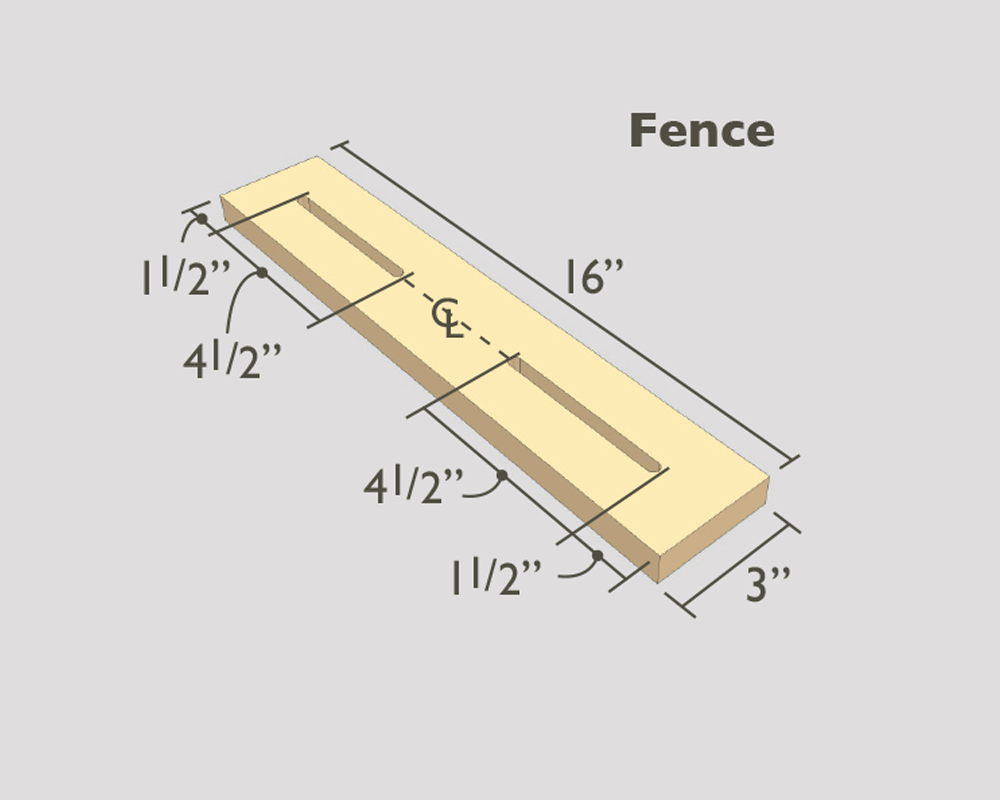
To build this unique jig, begin by adding a Miter Slider to a small Build-It Panel. Place in your table saw's miter slot and adjust for a good fit, then add a T-Slot Panel Connector to each edge. Add a large Build-It Panel to cross the line of cut and trim to the blade. Use the remaining piece of the large Build-It Panel along with another Miter Slider to make the drop panel as described in Steps 3 through 7 shown on the reverse side of your Build-It Panel's wrapper. Cut the slots in the fence as shown in Detail 3A, then attach using (2) 1/4-20 x 1-1/2" hex bolts with washers and Build-It Knobs. The slotted holes permit adjustment to almost any angle. Use test cuts to set your final fence angle based on the number of segments desired and tighten the clamping knobs.
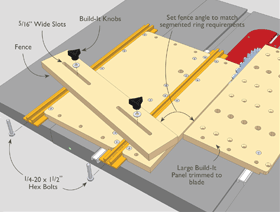
Fig 3
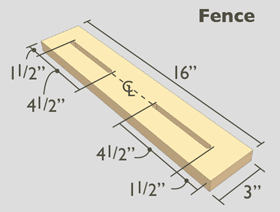
Detail 3A
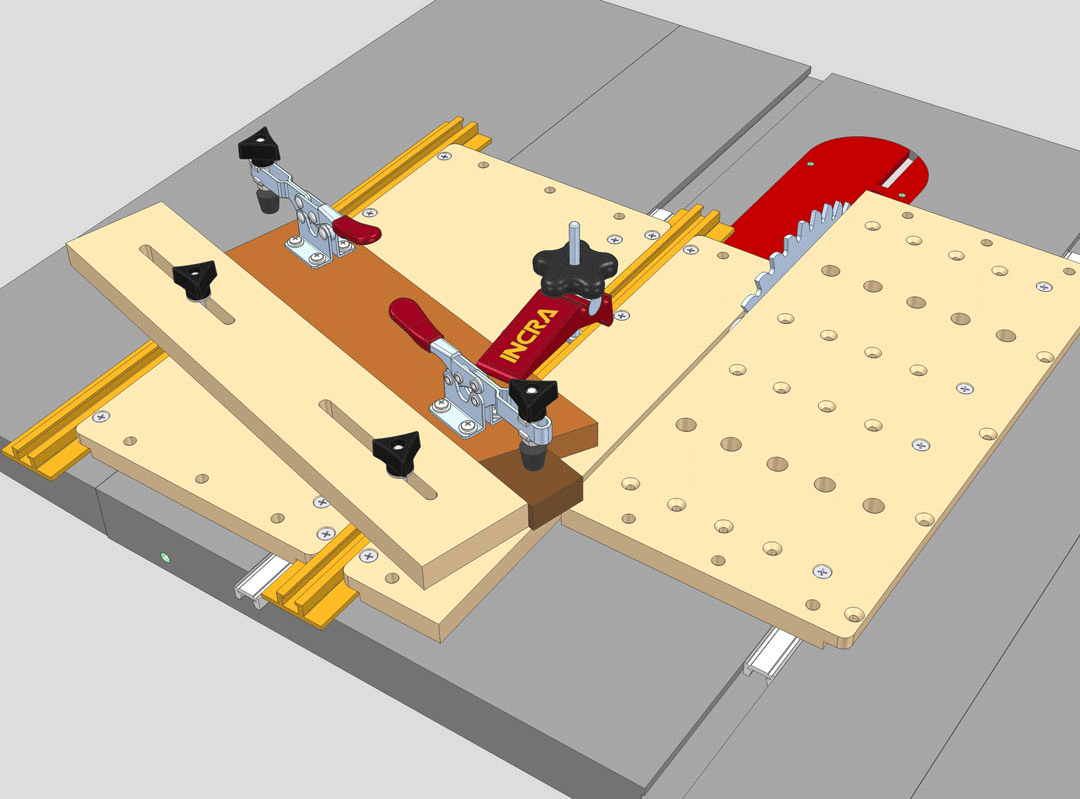
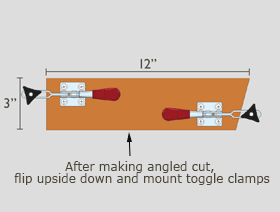
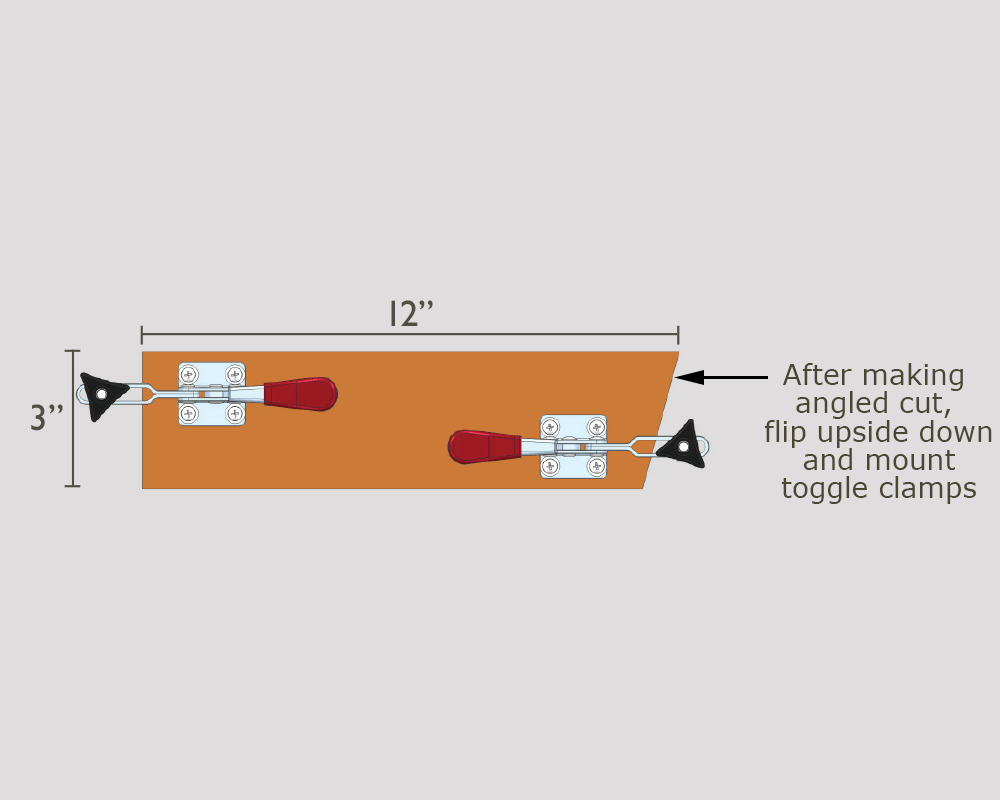
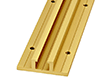
Build the toggle clamp platform shown in Fig 4 and Detail 4A, cutting one end to 90 degrees and the other end at the same angle required for your segments. You can accurately make the angled cut using your Build-It Jig since the fence should be at the correct angle and position. Flip the platform upside down and attach toggle clamps to favor the edges of the platform as shown. Allow enough of the toggle clamps' arms to overhang the platform so that you can reach to the center of your longest segment's length. Mark your jig's fence and toggle clamp platform with the number of segments required to complete the ring.
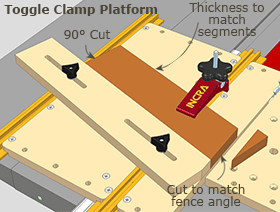
Fig 4
Detail 4A
The simple jig shown here solves both of these problems. A common reference edge (the outside of the ring) is maintained against the jig's fence during all of the angled cuts to insure proper color and grain sequencing during glue-up and, since the securely clamped segment is unable to move away from the blade, no cutoff nib is left to worry about.
To build this unique jig, begin by adding a Miter Slider to a small Build-It Panel. Place in your table saw's miter slot and adjust for a good fit, then add a T-Slot Panel Connector to each edge. Add a large Build-It Panel to cross the line of cut and trim to the blade. Use the remaining piece of the large Build-It Panel along with another Miter Slider to make the drop panel as described in Steps 3 through 7 shown on the reverse side of your Build-It Panel's wrapper. Cut the slots in the fence as shown in Detail 3A, then attach using (2) 1/4-20 x 1-1/2" hex bolts with washers and Build-It Knobs. The slotted holes permit adjustment to almost any angle. Use test cuts to set your final fence angle based on the number of segments desired and tighten the clamping knobs.
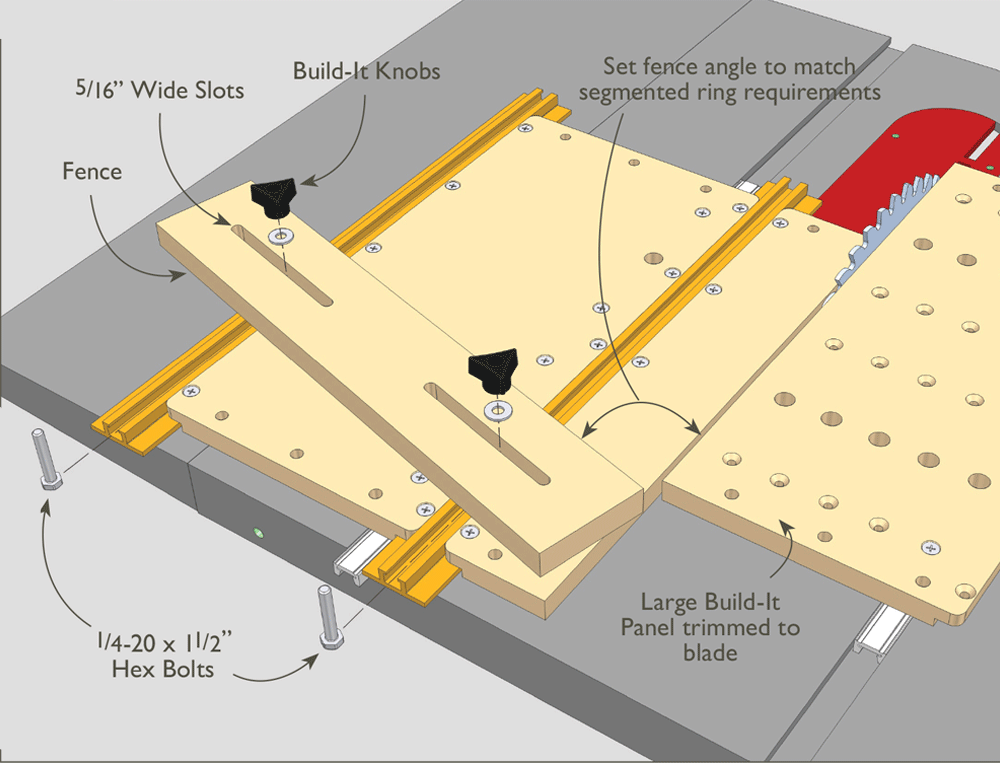
Fig 3
Detail 3A
Build the toggle clamp platform shown in Fig 4 and Detail 4A, cutting one end to 90 degrees and the other end at the same angle required for your segments. You can accurately make the angled cut using your Build-It Jig since the fence should be at the correct angle and position. Flip the platform upside down and attach toggle clamps to favor the edges of the platform as shown. Allow enough of the toggle clamps' arms to overhang the platform so that you can reach to the center of your longest segment's length. Mark your jig's fence and toggle clamp platform with the number of segments required to complete the ring.
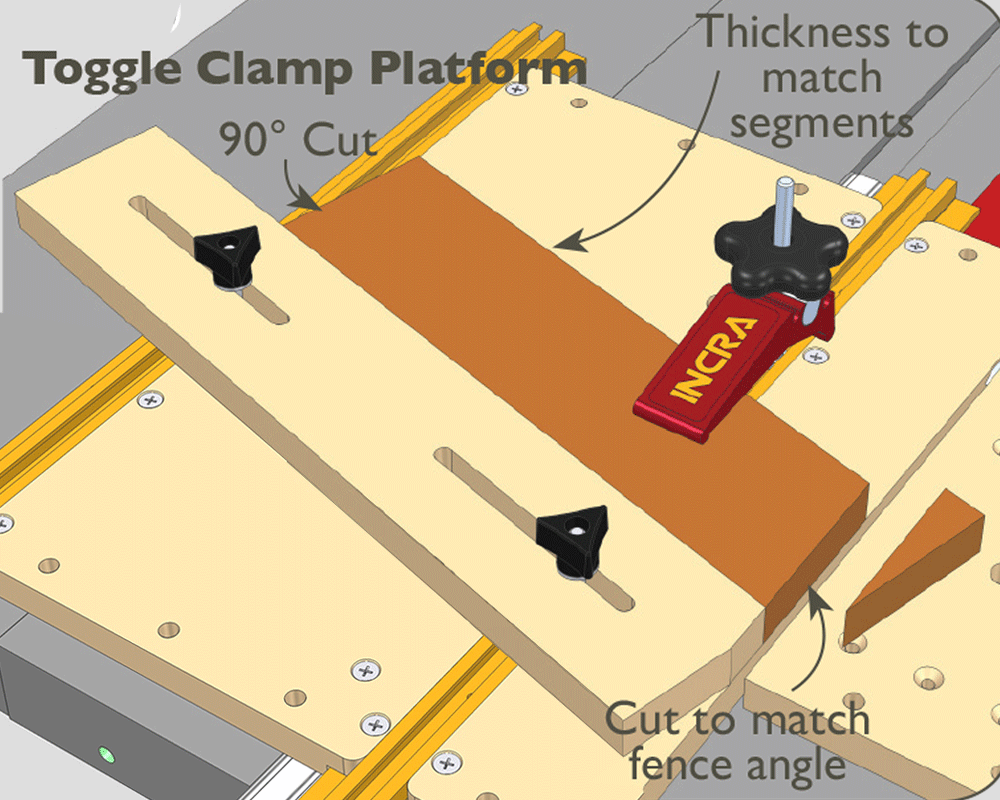
Fig 4
Detail 4A
Operation:
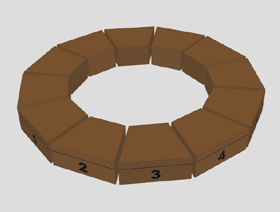
Step 1. After ripping your stock to width, mark one edge with a line that runs end to end then rough crosscut at 90 degrees as many "blanks" as you need for your project. Make these cuts about 1/8" - 1/4" longer than your desired finished length. Any method can be used for these rough cuts (even your bandsaw). You can number the pieces to maintain the grain alignments during glue-up, Fig. 5 and Detail 5A. Marked this way, segment blank stock can be pre-cut and stored in plastic bags until needed for future projects.
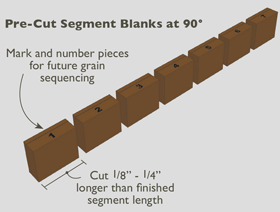
Fig 5
Detail 5A
Step 2. Set the toggle clamp platform against the fence on your Build-It Jig with the square end toward the blade. Set the distance between the end of the platform and the blade so that you remove only a minimum amount from your blanks then lock the platform in place using a Build-It Clamp. Position your segment blank with the reference edge against the fence, engage the toggle clamp, and make your cut, Fig. 6. Repeat for one end of all of your blanks.
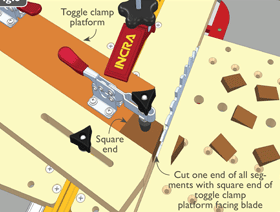
Fig 6
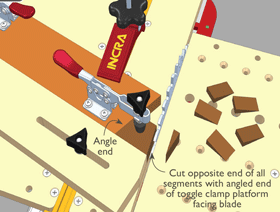
Fig 7
Step 3. Reposition the toggle clamp platform against the fence with the angled end toward the blade, Fig. 7. Set the final segment length by adjusting the distance between the end of the platform and the blade, then lock the platform in place with the Build-It Clamp. Now simply place each blank's reference edge against the fence, nesting the previous cut against the end of the toggle clamp platform and engage the toggle clamp to cut a perfect finished segment.
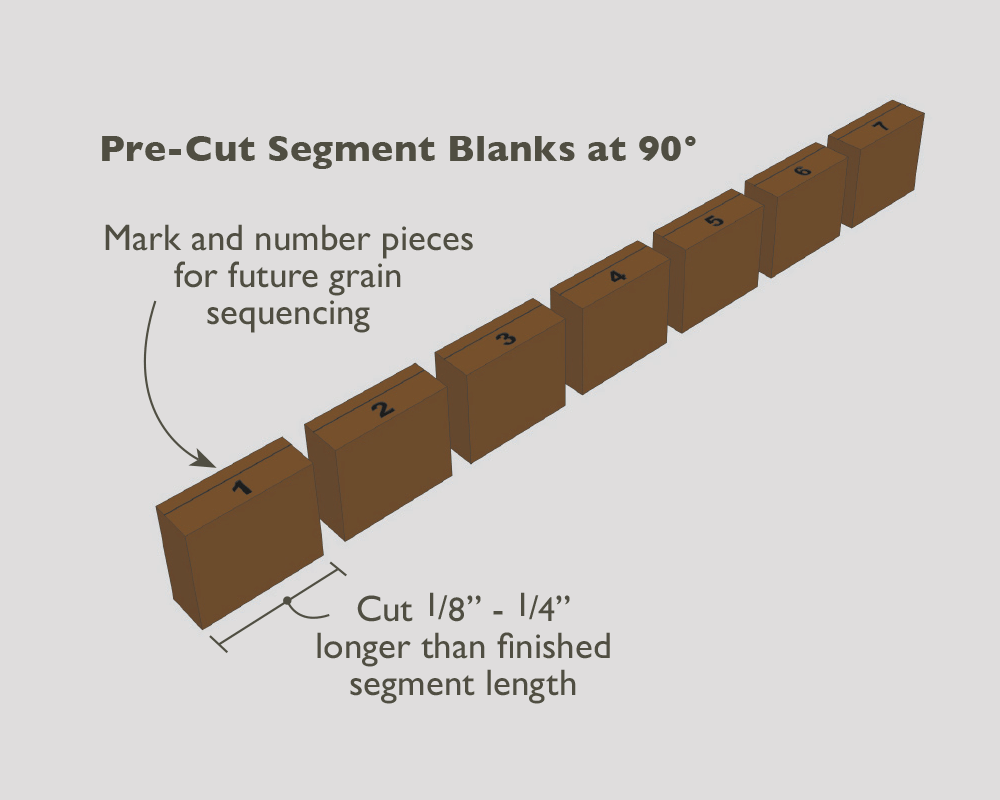
Fig 5
Detail 5A
Step 2. Set the toggle clamp platform against the fence on your Build-It Jig with the square end toward the blade. Set the distance between the end of the platform and the blade so that you remove only a minimum amount from your blanks then lock the platform in place using a Build-It Clamp. Position your segment blank with the reference edge against the fence, engage the toggle clamp, and make your cut, Fig. 6. Repeat for one end of all of your blanks.
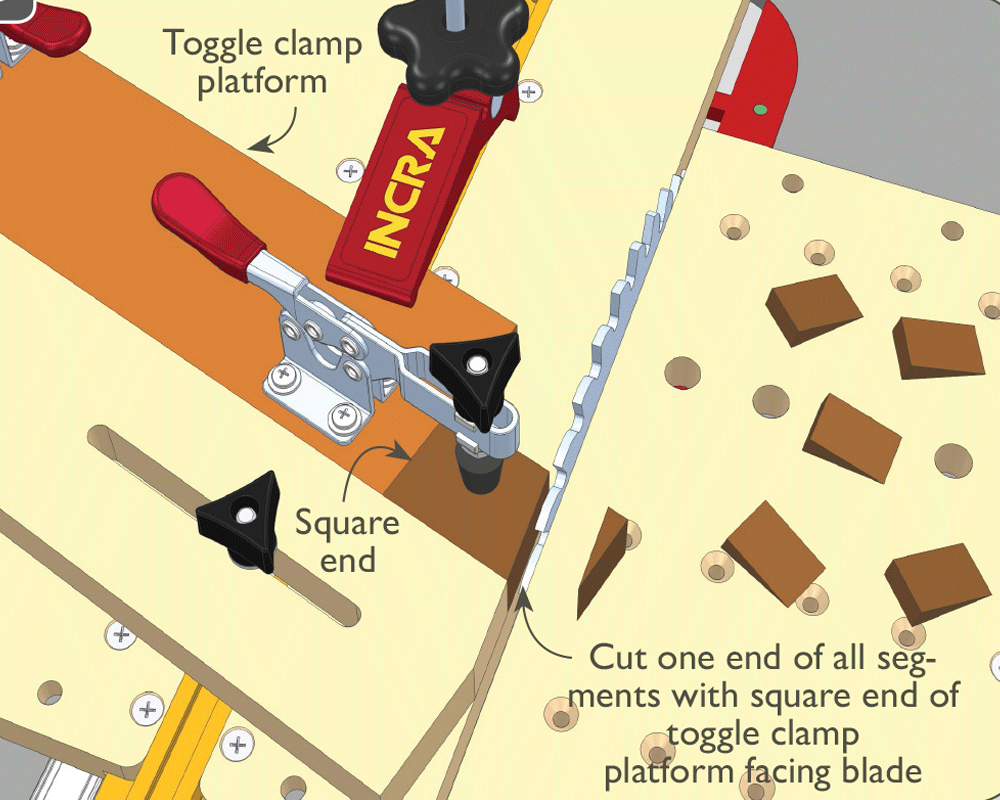
Fig 6
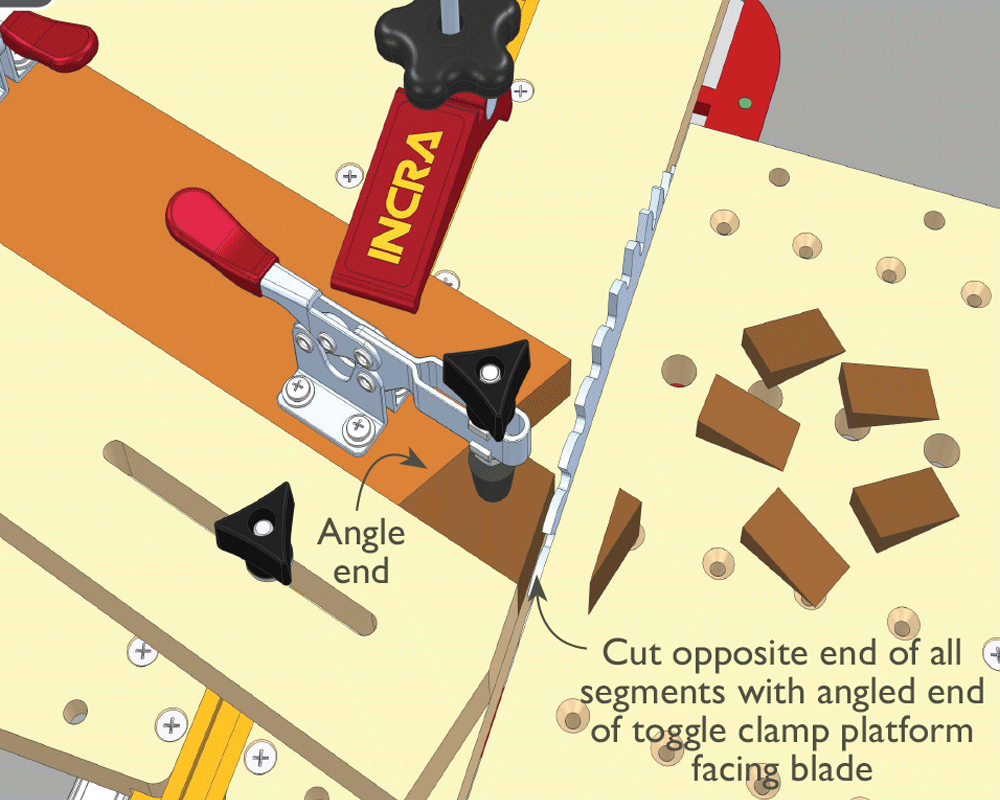
Fig 7
Step 3. Reposition the toggle clamp platform against the fence with the angled end toward the blade, Fig. 7. Set the final segment length by adjusting the distance between the end of the platform and the blade, then lock the platform in place with the Build-It Clamp. Now simply place each blank's reference edge against the fence, nesting the previous cut against the end of the toggle clamp platform and engage the toggle clamp to cut a perfect finished segment.
downloads
Click to download
Segmented Ring Jig Plan (008) in PDF format.
accessories
 INCRA T-Track Regular Single T-Track, no scale.
Choose from four lengths. Can be cut to fit your jig exactly.
INCRA T-Track Regular Single T-Track, no scale.
Choose from four lengths. Can be cut to fit your jig exactly. INCRA T-Track Plus The only T-Track with an included adjustable scale.
Choose from four lengths. Can be cut to fit your jig exactly.
INCRA T-Track Plus The only T-Track with an included adjustable scale.
Choose from four lengths. Can be cut to fit your jig exactly.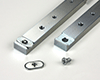 INCRA Miter Slider SE The steel bars are more
rigid than any wooden or plastic runners. Also compatible with all INCRA Build-It products.
INCRA Miter Slider SE The steel bars are more
rigid than any wooden or plastic runners. Also compatible with all INCRA Build-It products.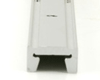 INCRA Miter Sliders This long aluminum
runner adjusts from the
INCRA Miter Sliders This long aluminum
runner adjusts from theTOP for perfect sliding action in any standard 3/4" x 3/8" miter gauge slot.
 INCRA Build-It T-Slot Panel Connectors Interconnect the 5/8” pre-cut and pre-drilled MDF Build-It Panels in seconds. Adds strength, rigidity and a rock solid T-slot.
 INCRA Build-It Clamp Works with any T-Track & INCRA’s New Build-It T-Slot Panel Connector.
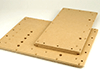 INCRA Build-It Panels These universal 5/8" MDF Panels are pre-cut and pre-drilled to instantly accept INCRA's Miter Sliders and
T-Slot Panel Connectors.
INCRA Build-It Panels These universal 5/8" MDF Panels are pre-cut and pre-drilled to instantly accept INCRA's Miter Sliders and
T-Slot Panel Connectors.


