Perry's tool zone
Lloyd Johnson
The Lamination Pro - by Lloyd Johnson
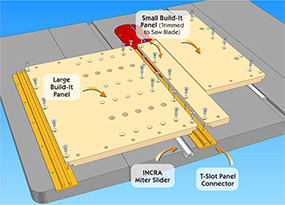
If you've taken a look at our new Build-It System's page, you've noticed quite a few free downloadable jig and fixture plans. These plans make it easy for the first time user of the Build It System's modular components to quickly assemble some pretty important jigs for the shop. From segmented ring jigs, to crosscut boxes, tenoning jigs, coping sleds and more, these plans also provide some interesting food for thought and can be used to begin the groundwork for designing your own custom fixtures for the cutting requirements in your shop.
I’ve personally enjoyed making and using each of the jigs shown in the plans, some of which were assembled and in use in less than 30 minutes. And for those of you who have seen some of the small pieces I cut for my puzzle boxes, I can assure you that jigs like these are the ONLY way to safely and accurately reproduce the results. Thanks to the Build It System, I’m looking forward to taking advantage of a little more time in my shop to work on the projects that I enjoy most. The free jig plans you’ll see included on the Build-It System’s page are just the beginning of a concerted effort at INCRA to provide a place for you to gather more than product information. Let’s face it, were it not for woodworking projects, who would need tools in the first place. So you can look forward to even more new Build It System Jig Plans in the future and beginning this week we have also added a NEW section to our website devoted to Woodworking Project Plans.
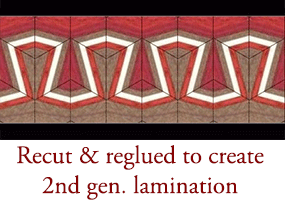
In a nutshell, the technique revolves around crosscutting a series of short pieces from a strip lamination with the miter angle set to some number less than 90 degrees. Every other one of the resulting pieces is then flipped over and the parts are glued back together. This first pattern is referred to as a first generation lamination. The process can then be repeated with the resulting glue up to create second or even third generation laminations with ever more intricate patterns.
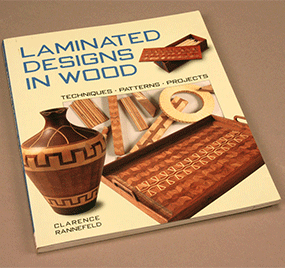
The use of mitered laminations in woodworking is a relatively new technique first introduced in Clarence Rannefeld's book, Laminated Designs in Wood, published in 1998. Mr. Rannefeld's descriptions, while very detailed, wonderfully illustrated and quite accurate, included many mathematical formulas to allow the craftsman to predict the results of the amazing patterns that could be created.
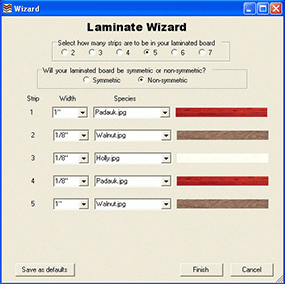
Lloyd created a computer software program called "Lamination PRO" that provides an easy to use method for designing and visualizing the infinite variety of decorative patterns that can be created using the mitered lamination technique. That means NO MATH. I found the program quite intuitive with a simple set of buttons to set the program in motion. You can choose the wood types from a drop down menu that includes everything from the exotics like Bloodwood and Ebony to every type of figured Maple. The program lets you choose the angle and width of the crosscuts as well as your blade kerf and the graphics make it as much fun to create the patterns on your screen as it is to create them in your shop. You can learn more about this exciting program at: www.woodturnerpro.com/software/lamPro.html
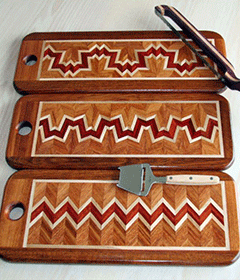
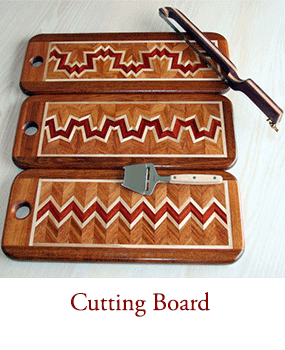
You'll surely enjoy Lloyd's Cutting Board project. It allows 3 design variations that all begin with the same strip lamination. I particularly enjoyed Lloyd's simple Build-It System jig design that features a unique incremental positioning element for locating each of the crosscuts. I think this project is the perfect entry point for someone wanting to learn more about this technique. It uses very little stock, insures a high level of success and is certainly going to be a desirable item in your circle of friends.
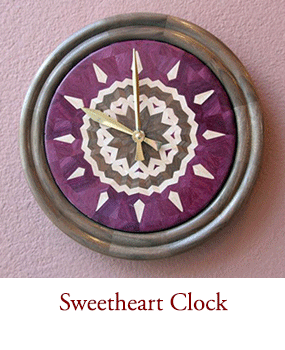
The Sweetheart Clock project takes the mitered lamination technique to the next level by cutting the final lamination into radial segments that are glued to form a circular disc. The final decorative element details can be either turned or cut using a circle-cutting jig at your band saw. No doubt the timeless beauty of this project will make the additional challenges worth it.


The third generation board after cutting and sliding.

Keep us posted on your unique shop layout or any special project you may be working on by dropping me an email: perry@incra.com
If you are not able to view the book or you do not have Adobe Acrobat installed, you may download it here. Simply follow the instructions provided by Adobe.
